性能测试的重要性
因为最近用到的性能测试工具比较多,例如fio, wrk。所以难免有一些感慨。
计算机是一个严格的科学工具,里边没有黑魔法,里边所有的东西都是可以测量的。什么是科学?科学具有可证伪性,可检验性。有个有趣的段子:
1 | 你要是推翻西医里的理论,那是可以拿诺奖的。 |
回忆之前在课本里学到了很多概念,例如时间复杂度分析,学的时候觉得很枯燥,彷佛用不上。平时自己写的小程序,在自己的个人电脑上也都是瞬间执行结束的。根本体会不到时间复杂度的重要性。直到我在leetcode上遇到1G的数据量时,我才真正的体会到了时间复杂度的重要。
1 | log(10**9,2) |
不知道,你有没有对这个计算结果吃惊呢?
有的时候我就在想:是计算机太快了,绝大多数普通人是感受不到毫秒级的延迟的。当然更重要的是好多人也不会遇到这样的问题,毕竟能有百万并发的场景是少数大厂。既然遇不到这样的问题,那么所有的知识,就会变得枯燥。
Latency Numbers Every Programmer Should Know
anyway所有的东西都是可以测试的,可以通过数学去计算,度量的。去分析瓶颈在哪里,看Htop, 火焰图,iostat,最后分析讨论该怎么优化。
记得用成熟的工具去测试,否则盲目的人肉测试是不科学的。
Http性能测试
无意中发现了一个非常simple的http-server, 还是那句话,http的本质是确定格式的文本读写。
1 | wrk -t12 -c400 -d30s http://127.0.0.1:7890 |
结果
1 | Running 30s test @ http://127.0.0.1:7890 |
Htop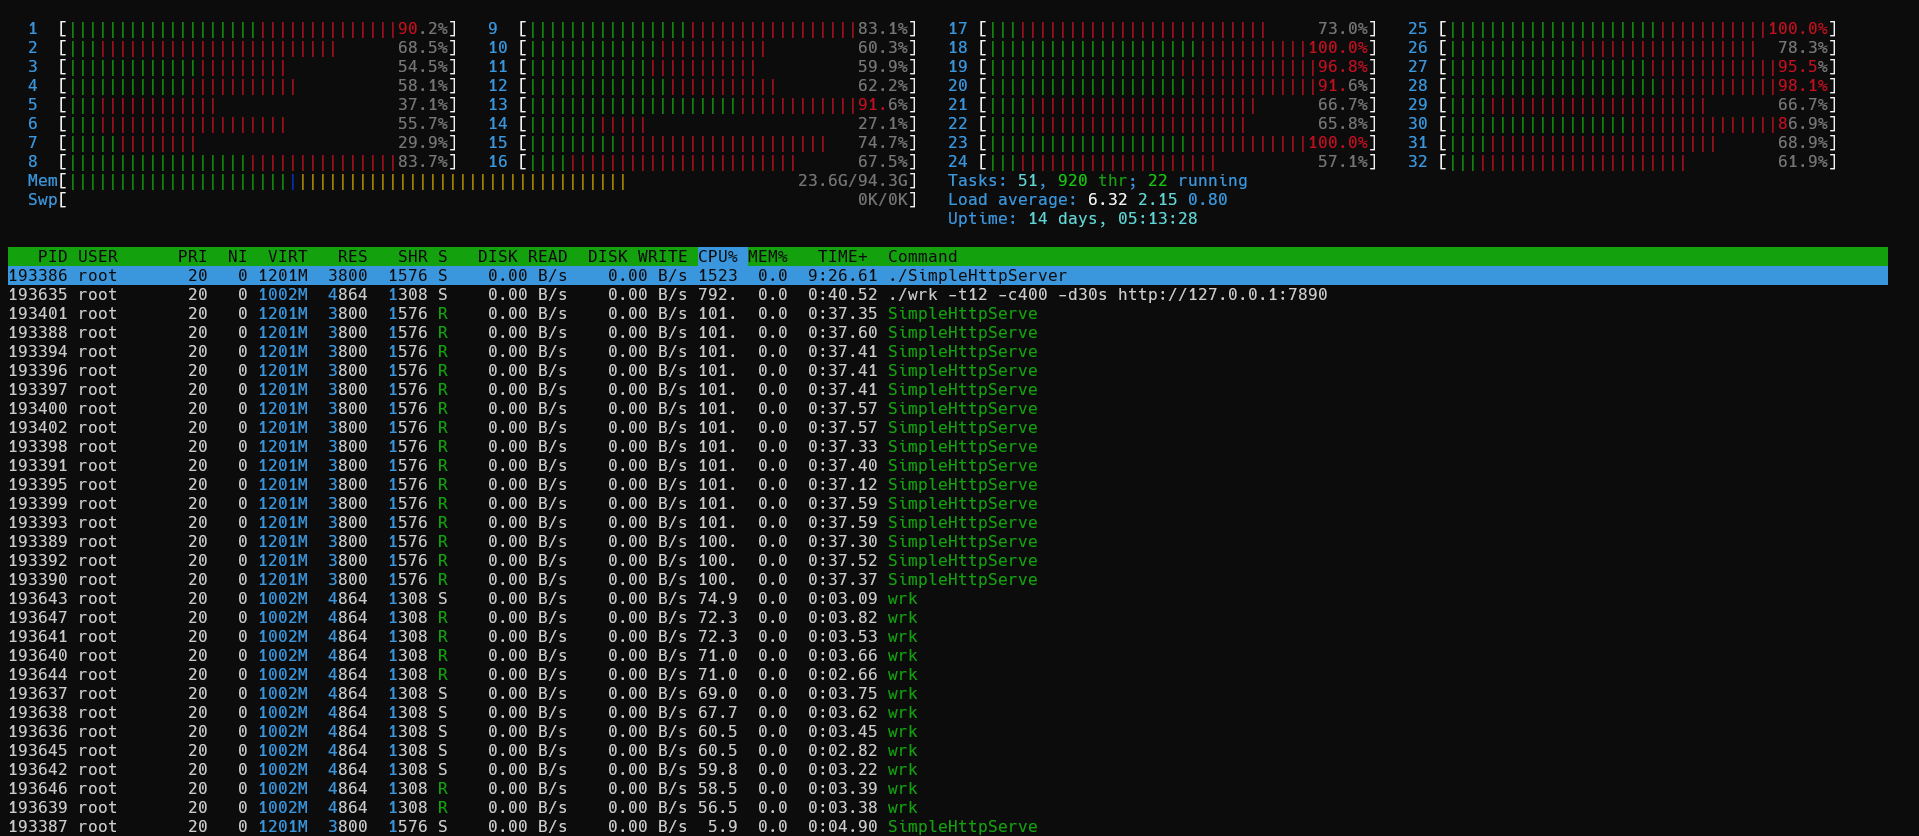
对比一下之前的常用的Flask
1 | (venv) [root@node1 demo-flask]# python demo.py |
1 | [root@node1 wrk]# ./wrk -t12 -c400 -d30s http://127.0.0.1:5000 |
加上WSGI
- 四进程
1
2
3
4
5
6
7
8(venv) [root@node1 demo-flask]# gunicorn -w 4 -k gevent demo:app -b :7889
[2024-03-13 08:49:25 +0000] [220624] [INFO] Starting gunicorn 21.2.0
[2024-03-13 08:49:25 +0000] [220624] [INFO] Listening at: http://0.0.0.0:7889 (220624)
[2024-03-13 08:49:25 +0000] [220624] [INFO] Using worker: gevent
[2024-03-13 08:49:25 +0000] [220627] [INFO] Booting worker with pid: 220627
[2024-03-13 08:49:25 +0000] [220628] [INFO] Booting worker with pid: 220628
[2024-03-13 08:49:25 +0000] [220629] [INFO] Booting worker with pid: 220629
[2024-03-13 08:49:26 +0000] [220630] [INFO] Booting worker with pid: 2206301
2
3
4
5
6
7
8
9
10[root@node1 wrk]# ./wrk -t12 -c400 -d30s http://127.0.0.1:7889
Running 30s test @ http://127.0.0.1:7889
12 threads and 400 connections
Thread Stats Avg Stdev Max +/- Stdev
Latency 24.68ms 147.52ms 2.00s 96.66%
Req/Sec 3.44k 3.16k 11.86k 53.42%
353945 requests in 30.04s, 57.72MB read
Socket errors: connect 0, read 0, write 0, timeout 502
Requests/sec: 11782.63
Transfer/sec: 1.92MB - 八进程
1
2
3
4
5
6
7
8
9
10[root@node1 wrk]# ./wrk -t12 -c400 -d30s http://127.0.0.1:7889
Running 30s test @ http://127.0.0.1:7889
12 threads and 400 connections
Thread Stats Avg Stdev Max +/- Stdev
Latency 13.29ms 107.98ms 2.00s 98.02%
Req/Sec 4.49k 2.79k 17.94k 71.28%
709308 requests in 30.04s, 115.67MB read
Socket errors: connect 0, read 11, write 0, timeout 445
Requests/sec: 23612.98
Transfer/sec: 3.85MB - 十六进程总结
1
2
3
4
5
6
7
8
9
10[root@node1 wrk]# ./wrk -t12 -c400 -d30s http://127.0.0.1:7889
Running 30s test @ http://127.0.0.1:7889
12 threads and 400 connections
Thread Stats Avg Stdev Max +/- Stdev
Latency 86.79ms 283.99ms 2.00s 91.56%
Req/Sec 4.73k 3.01k 28.13k 67.26%
1318602 requests in 30.10s, 215.04MB read
Socket errors: connect 0, read 0, write 0, timeout 1732
Requests/sec: 43807.48
Transfer/sec: 7.14MB